
Displaying Signals Data in Salesforce
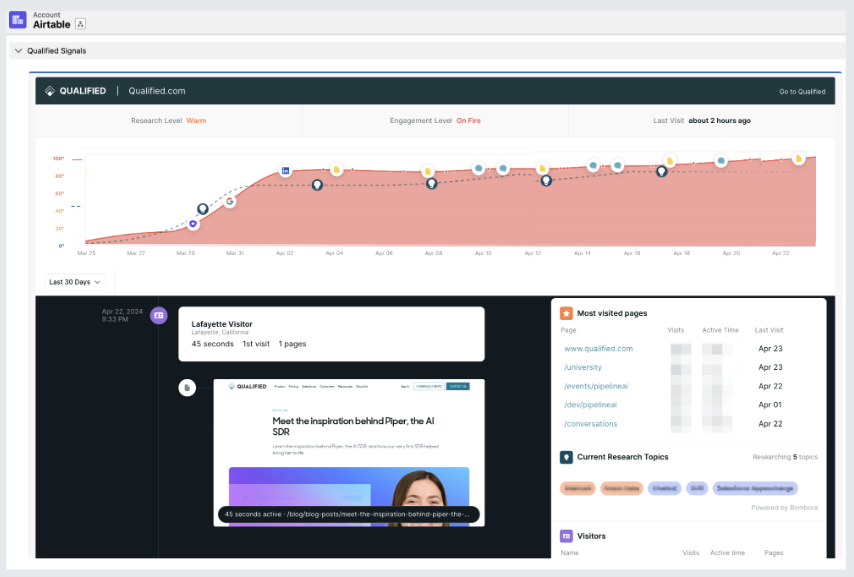
When a visitor is matched to a Salesforce account, we present Signals data in the Account 360 and on the visitor’s associated account object in Salesforce. Qualified pushes Signals data into Salesforce to update your mapped fields with the most recent information.
- Map Qualified Signals Data to Salesforce
- When Signals Data is Updated in Salesforce
- Signals Visualforce Component
<span id="map-signals-to-salesforce"></span>
Map Qualified Signals Data to Salesforce
First, your Salesforce admin needs to create new fields in Salesforce for Qualified Signals data. This can be done by downloading the Signals unmanaged package or adding fields manually.
<span id="download"></span>
Download the Signals Unmanaged Package
Qualified offers a Signals unmanaged package that includes a collection of custom fields added to the Account object, reports, and dashboard components to showcase Signals data for your organization.
How to Install
First, reach out to your Qualified Success Architect for the password. Once you have the password, follow the steps below to install the unmanaged package:
- Go to the Signals package’s installation page.
- Enter your username and password for your Salesforce organization and click Log In. The installation page will appear.
- Enter the password provided by your Qualified Success Architect.
- Select Rename Conflicting Components in Package.
- Select Install for All Users, which specifies the following settings on all internal custom profiles.some text
- Object permissions— Read, Create, Edit, and Delete enabled
- Field-level security—set to visible and editable for all fields
- Apex classes—enabled
- Visualforce pages—enabled
- App settings—enabled
- Tab settings—enabled
- Page layout settings—enabled
- Record Type settings—copied from admin profile
- Click Install.
- Click Done.
If you want to test the package first, open the same Signals unmanaged package page and log in to your sandbox account, rather than your production account.
Included Components
The Qualified Signals unmanaged package includes fields added to the Account object, reports, and a dashboard.
Fields added to the Account object
- Qualified Signals Engagement Intent
- Qualified Signals Engagement Score
- Qualified Signals Engagement Trend
- Qualified Signals Research Intent
- Qualified Signals Research Score
- Qualified Signals Visitor Count
- Qualified Signals Session Count
- Qualified Signals Active Session Time
- Qualified Signals Meetings Booked Count
- Qualified Signals Rep Conversation Count
- Qualified Signals Bot Conversation Count
- Days Since Last Activity_Qualified
Reports
- Signals Scores with Accounts
- Engagement On Fire Accounts by Rep
- Engagement Hot Accounts by Rep
- Engagement Warm Accounts by Rep
- Hot Research Accounts by Rep
- Warm Research Accounts by Rep
Dashboard
- Signals Sales Prioritization Dashboard
Customize Your Salesforce Reports and Dashboards
As you analyze the included reports and dashboard or build your own, make modifications within Salesforce to suit your team’s unique needs. For example, create a new filter to exclude existing customers or only view target accounts. Alternatively, use the Signals Sales Prioritization Dashboard’s global filter for Account Owner.
Troubleshooting
Why are my fields empty in Salesforce?
If all of the fields are empty, log in to your Qualified admin account and follow the steps outlined below for Mapping Signals Fields to the Account fields in Salesforce.
If the only blank fields are Qualified Signals Research Intent and Qualified Signals Research Score, your Qualified plan may not include Research Intent. Any installed package reports referencing Research Intent, such as Hot Research Accounts by Rep, and the Research Intent tiles on the Signals Sales Prioritization Dashboard will also not display any data. You can delete those tiles from your dashboard for a more streamlined appearance.
Why does my installed package not include all of the components listed here?
If you downloaded our Signals unmanaged package before December 2022, you may have slightly different components that do not include Research Intent.
To bring Research Intent data into Salesforce, create two additional fields: Qualified Signals Research Intent (data type: text) and Qualified Signals Research Score (data type: number), then follow the steps outlined below for Mapping Signals Fields to the new Account fields in Salesforce. You can then build Salesforce reports and dashboards that include your accounts’ Signals Research Intent without losing existing data.
<span id="manual"></span>
Manually Create Custom Fields in Salesforce
If you choose to manually create custom fields in Salesforce for Signals data, follow the guide below on what fields you’ll want to create:
*Your Salesforce org may already have a Days Since Last Activity field, so creating a new one is not necessary. If your org doesn't already have one, follow these steps to create it.
Days Since Last Activity is a formula field that calculates (TODAY()- LastActivityDate). If you track scheduled activities in Salesforce that have not happened yet, it may show a negative number. You can create a filter within Salesforce to remove those values.
To map the new Salesforce fields, log in to your Qualified admin account and use the Salesforce Account Mapper to map the fields.
<span id="updated"></span>
When Signals Data is Updated in Salesforce
Qualified pushes an account's Signals data into Salesforce at 9:00 pm PT when there are no website visitors from that account in the last 24 hours. When someone from that account does visit your website, Qualified pushes any updated Signals fields into Salesforce within five minutes of the visitor’s session ending.
<span id="signals-visualforce-component"></span>
Signals Visualforce Component
We recommend adding the Signals Account 360 snapshot to your Salesforce account page layout. This aggregates information about your accounts in a single place—and right where your team already looks. Learn how embed the Signals Visualforce Component.
For more detailed guidance on how to configure Signals to display data in Salesforce, check out our Signals Salesforce Settings guide. If you have questions, reach out to your Qualified Success Architect, or reach out to help@qualified.com.
Heading 1
Heading 2
Heading 3
Heading 4
Heading 5
Heading 6
Lorem ipsum dolor sit amet, consectetur adipiscing elit, sed do eiusmod tempor incididunt ut labore et dolore magna aliqua. Ut enim ad minim veniam, quis nostrud exercitation ullamco laboris nisi ut aliquip ex ea commodo consequat. Duis aute irure dolor in reprehenderit in voluptate velit esse cillum dolore eu fugiat nulla pariatur.
Lorem ipsum dolor sit amet, consectetur adipiscing elit, sed do eiusmod tempor incididunt ut labore et dolore magna aliqua. Ut enim ad minim veniam, quis nostrud exercitation ullamco laboris nisi ut aliquip ex ea commodo consequat. Duis aute irure dolor in reprehenderit in voluptate velit esse cillum dolore eu fugiat nulla pariatur.
Lorem ipsum dolor sit amet, consectetur adipiscing elit, sed do eiusmod tempor incididunt ut labore et dolore magna aliqua. Ut enim ad minim veniam, quis nostrud exercitation ullamco laboris nisi ut aliquip ex ea commodo consequat. Duis aute irure dolor in reprehenderit in voluptate velit esse cillum dolore eu fugiat nulla pariatur.

Block quote
Ordered list
- Item 1
- asdfasdf
- asdfasdf
- asdfasdf
- Item 2
- Item 3
Unordered list
- Item A
- Item B
- Item C
Bold text
Emphasis
Superscript
Subscript
|
|---|
|


.svg)


