
<span id="top"></span>
Chat User Setup Guide
Welcome to Qualified—the #1 pipeline generation platform! Qualified empowers you to connect with your best buyers in real time, directly on your company’s website. With tools like live chat, meeting scheduling, and AI-driven insights, you can easily engage website visitors and qualified leads, turning interactions into valuable pipeline.
In this guide, we’ll walk you through setting up your account so you can start chatting with visitors, scheduling meetings, and driving pipeline. Let’s get started!
Prefer to watch instead? Check out our onboarding video.
- Access Your Account
- Connect Your Calendar
- Personalize Your Profile
- Add Your Meeting Details
- Connect to Salesforce
- Configure Calendar Settings
- Customize Notifications
- Enable Browser Notifications, Camera, and Microphone Access
- Download the Qualified Desktop & Mobile Apps
- Learn more🚀
<span id="video"></span>
Chat User Setup Guide: Video
<span id="create-account"></span>
1. Access Your Account
Your Qualified Admin determines how you and your team will access Qualified. This will be set up in one of two ways:
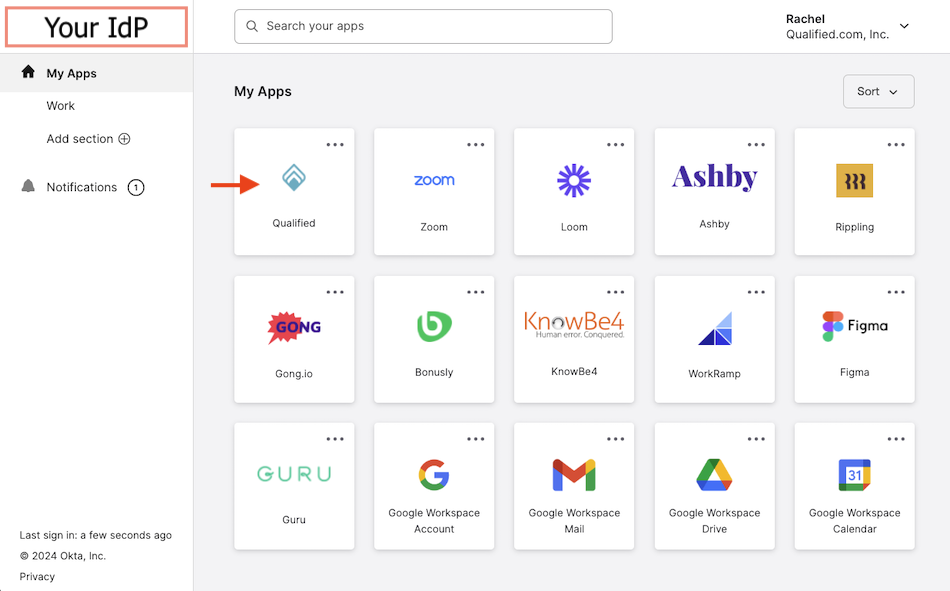
- Single Sign-On (SSO): You’ll log in using your company’s Identity Provider (IdP), such as Okta, Azure, or OneLogin.
- If your admin has enabled SCIM (a tool for automatically syncing user accounts), you can access your account by clicking the Qualified tile in your IdP.
- If SCIM is not enabled, you’ll first receive an email invitation from invite@qualified.com to log in and set up your account. After that, you can use the Qualified tile in your IdP for future access.
- Email & Password: You’ll receive an email invitation from invite@qualified.com to create your account and set a password.

No matter how you log in for the first time, all Chat and Meetings users will follow the same onboarding steps, starting with Step 2: Connect Your Calendar.
<span id="connect-calendar"></span>
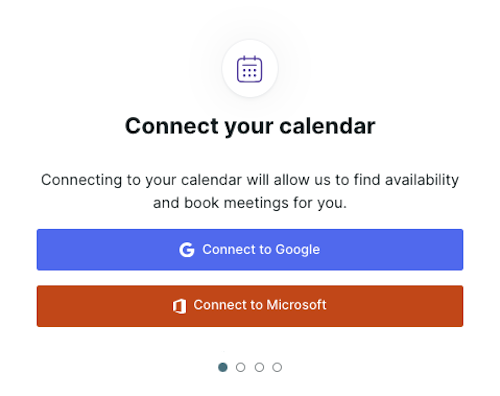
2. Connect Your Calendar
Connecting your calendar ensures visitors can easily book meetings with you at the right time: Google Calendar or Microsoft Outlook Calendar
<span id="google-calendar"></span>
Google Calendar
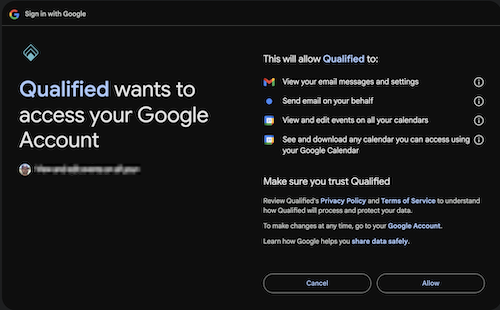
- Click Connect to Google.
- Follow the prompts to log into your Google account.
- If prompted, check all permission levels to grant Qualified access to your email and calendar.
- Click Allow.
<span id="microsoft-calendar"></span>
Microsoft Outlook Calendar
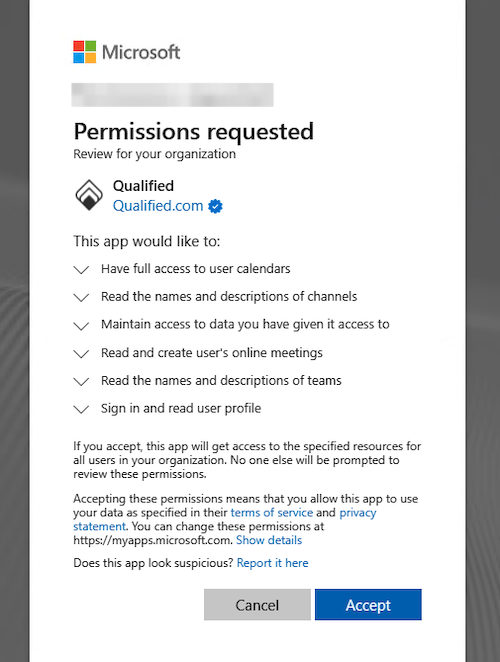
- Click Connect to Microsoft.
- Follow the prompts to log into your Microsoft account.
- Click Accept to authorize the connection.
- If you see a “Need admin approval” error, ask your Microsoft Azure admin to follow the steps here to grant the minimum needed permissions for our integration:
- Calendars.ReadWrite
- User.Read
- Offline_access
- If you see a “Need admin approval” error, ask your Microsoft Azure admin to follow the steps here to grant the minimum needed permissions for our integration:
- To avoid discrepancies in meeting times, remove additional time zones from your Outlook calendar (Manage time zone settings in Outlook).
For Admins: Qualified uses OAuth2 and the Microsoft Graph API to view and create events on calendars. This integration is compatible with most work, personal, and school Microsoft Outlook accounts.
<span id="complete-profile"></span>
3. Personalize Your Profile
Your profile helps website visitors know who they’re connecting with. A friendly, engaging profile builds trust and encourages bookings.
- Upload a profile photo (JPG or PNG).
- Add your first name, last name, and job title.
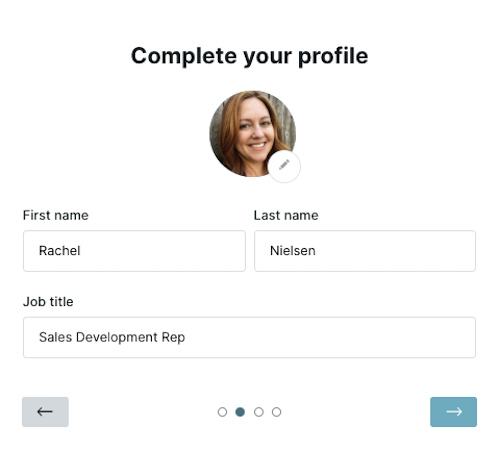
Make your title approachable! For example: Instead of "Sales Development Rep," try "Here to help you find your perfect solution!" or “[Company Name] Expert”
<span id="add-meeting-details"></span>
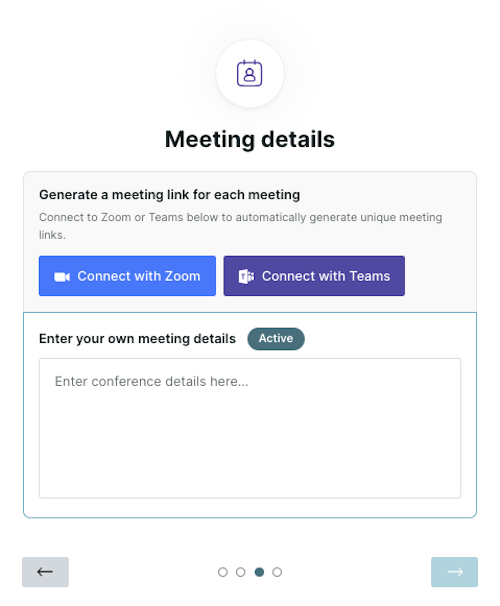
4. Add Your Meeting Details
Meeting details ensure visitors receive the correct information to join the meetings they book with you. Setting up your meeting details allows Qualified to send this information automatically.
Connect with Zoom or Microsoft Teams
- Zoom or Microsoft Teams: Connect your account to automatically generate unique meeting links for each booked meeting.
- Other Options: If you don’t use Zoom or Teams, you can manually add a personal conference link, such as a permanent Google Meet link, or phone number that attendees will use to join.
If you’re adding a personal conference link, ensure the link is for joining meetings—not scheduling new ones—to avoid confusion.
<span id="connect-zoom"></span>
Connect with Zoom
- Click Connect with Zoom.
- Follow the prompts to Sign In
- You may be prompted to verify your identity with a code sent to your email.
- Check Allow this app to use my shared access permissions, and click Allow.
If your Zoom admin requires pre-approval for new apps, the admin will need to enable the “Approve use of this app” toggle under App Permissions for our Qualified app in the Zoom Marketplace.
<span id="connect-teams"></span>
Connect with Microsoft Teams
- Click Connect with Teams.
- Sign in with your Microsoft Teams credentials.
- When prompted, click “Yes” to allow app permissions.
<span id="google-meet"></span>
Using Google Meet
If you are using Google Meet, you can follow the steps below to create a “Permanent Google Meet Link” that you can manually add to your Meetings Details.
- In your Google Calendar, create a new event.
- Click “Add Google Meet video conferencing”.
- Adjust these settings:
- Next to Does not repeat, click the down arrow icon and select Custom…
- Set the event to repeat every month and select Ends: Never. (This event will serve as a placeholder.)
- Save the Event, then copy the generated Google Meet URL
- Paste the URL into the “Enter your own meeting details” section in Qualified.
<span id="connect-to-salesforce"></span>
5. Connect to Salesforce
Integrating with Salesforce ensures your Leads, Contacts, and Accounts are updated automatically.
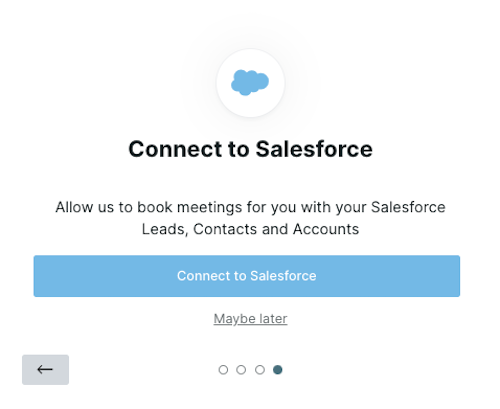
If you don’t see this option, your admin has already completed the connection for you.
Steps to Connect Salesforce:
- Click ‘Connect to Salesforce’.
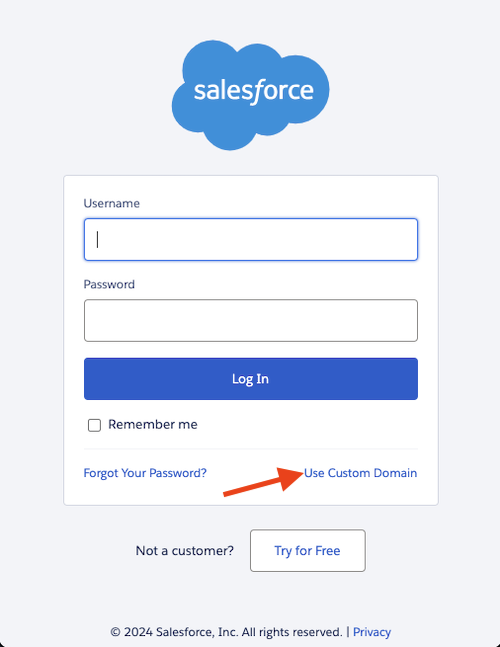
- Log in with your Salesforce credentials.
- If your company uses a custom domain, select ‘Use Custom Domain’ and enter your domain before logging in.
<span id="meeting-settings"></span>
6. Configure Calendar Settings
Fine-tune your calendar preferences to optimize meeting scheduling.
Verify Local Time Zone
- Go to Settings → Me → Profile.
- Verify Your Local time zone is correct
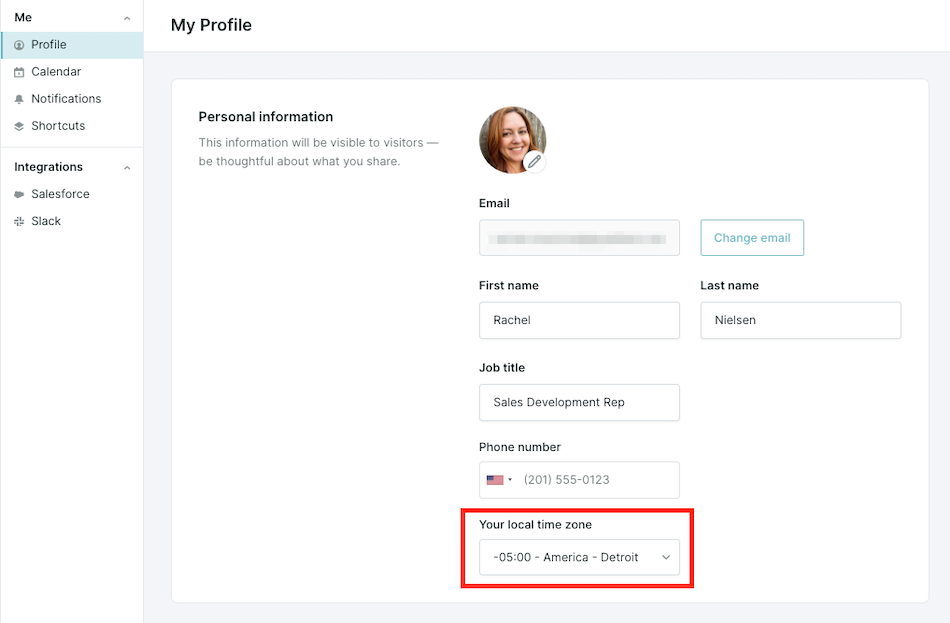
- Verify the time zone in Qualified matches the time zone set in your Google Calendar or Microsoft Outlook.
Additional Calendar Settings
- Next, go to Settings → Me → Calendar.
- Review or adjust the following settings
- Set your availability: Define the days and times visitors can book meetings with you (e.g., weekdays 9 AM–5 PM).

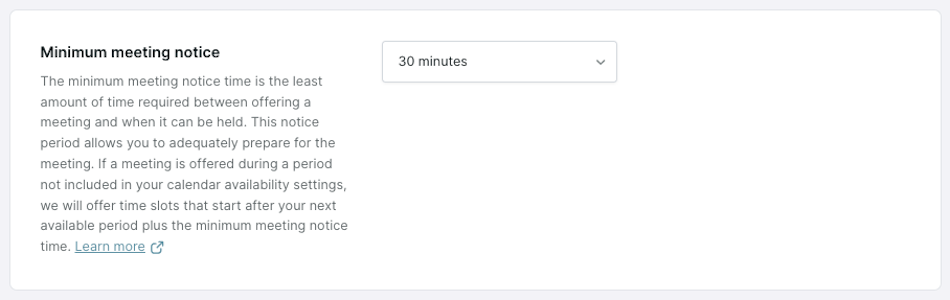
- Minimum meeting notice: Determines how much time between when a visitor requests a meeting and the first available time slot they’re offered.
- Buffer between meetings: The minimum time you want between back-to-back meetings already scheduled on your calendar.

Start with the defaults—30 minute minimum meeting notice and no buffer—to ensure ample availability on your calendar for prospects to book.
<span id="notifications"></span>
7. Enable Notifications
Notifications ensure you never miss a chance to connect with visitors by alerting you to key actions, like chat requests, auto pounce replies, or VIP visitors arriving on your website. Customizing your notification settings helps you stay focused on what matters most.
These settings only apply to in-app notifications when logged into Qualified. They do not affect notifications created by your Qualified Admin for tools like Slack or Microsoft Teams.
How to Customize Notifications
To enable and customize notification sound alerts:
- Go to Settings → Me → Notifications.
- Alert types:
- Return visitors: Receive an alert when a visitor you own has returned to the website after at least one prior visit.

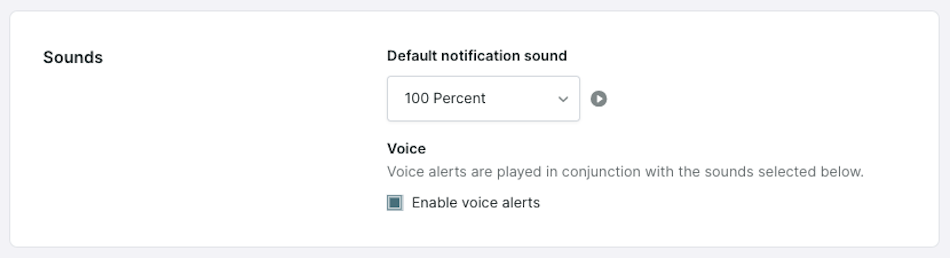
- Sounds:
- Select a default notification sound from the dropdown menu.
- Enable voice alerts to receive in conjunction with the sounds selected below. You will have to enable specific Steams to receive voice alerts for below.
- Stream Notifications:
- Adjust notifications for individual visitor streams (e.g., VIP visitors, High Intent, etc.).
- Click the “Desktop” or “Mobile” icons to control where notifications are sent.
- To enable/disable mobile notifications, first log in to the Qualified Mobile App.
- The “Waiting for a Rep” stream is always active and cannot be disabled.

<span id="browser-settings"></span>
8. Enable Browser Notifications, Camera, and Microphone Access
In Google Chrome and other browsers, click the settings icon in the URL bar to enable Notifications, as well as Camera and Microphone for Voice & Video calls.

<span id="desktop-mobile"></span>
9. Download the Qualified Desktop & Mobile Apps
Qualified Desktop App
- Download the most recent version for Mac OS (164MB) or Windows (119 MB).
- Click “Sign In” from the desktop app while still logged in to Qualified in your browser.
- Click “Authorize” on the confirmation page that opens in your default browser.
For more noticeable visitor alerts, add the Qualified app to your desktop dock.
Qualified Mobile App
Download Qualified Mobile from the Apple App Store or Google Play store to never miss a visitor. With our app, receive visitor push notifications, chat on the go, and more.
<span id="learn-more"></span>
10. Learn More 🚀
And that's it—you're all set in Qualified!
Level up your live chat skills to engage VIP visitors as soon as they’re on your website. Complete our Qualified Sales Rep certification, watch the 1-2 Punch Masterclass, and check out University articles for more impactful visitor conversations and, ultimately, close more sales.
Heading 1
Heading 2
Heading 3
Heading 4
Heading 5
Heading 6
Lorem ipsum dolor sit amet, consectetur adipiscing elit, sed do eiusmod tempor incididunt ut labore et dolore magna aliqua. Ut enim ad minim veniam, quis nostrud exercitation ullamco laboris nisi ut aliquip ex ea commodo consequat. Duis aute irure dolor in reprehenderit in voluptate velit esse cillum dolore eu fugiat nulla pariatur.
Lorem ipsum dolor sit amet, consectetur adipiscing elit, sed do eiusmod tempor incididunt ut labore et dolore magna aliqua. Ut enim ad minim veniam, quis nostrud exercitation ullamco laboris nisi ut aliquip ex ea commodo consequat. Duis aute irure dolor in reprehenderit in voluptate velit esse cillum dolore eu fugiat nulla pariatur.
Lorem ipsum dolor sit amet, consectetur adipiscing elit, sed do eiusmod tempor incididunt ut labore et dolore magna aliqua. Ut enim ad minim veniam, quis nostrud exercitation ullamco laboris nisi ut aliquip ex ea commodo consequat. Duis aute irure dolor in reprehenderit in voluptate velit esse cillum dolore eu fugiat nulla pariatur.

Block quote
Ordered list
- Item 1
- asdfasdf
- asdfasdf
- asdfasdf
- Item 2
- Item 3
Unordered list
- Item A
- Item B
- Item C
Bold text
Emphasis
Superscript
Subscript
|
|---|
|


.svg)


