
Building Manual Experiences
While Automatic Experiences fire as soon as your visitor loads a page of your website, Manual Experiences can be triggered based on a contextual action taken by the visitor - clicking a link or call to action on your website, for example, or following a custom link you’ve sent them in an email.
<span id="new-manual-experiences"></span>
Creating New Manual Experiences
To create a new Manual Experience as a Qualified Admin:
- Go to Settings → Experiences → Manual.
- Click the + Create manual experience button at the top.
- Add a descriptive name in the Name this experience… field.
- Click the Save Experience button in the top right corner.
- Build the experience flow by clicking the + Add Action button under the visitor criteria. The actions available are the same as the Button Experiences.
Once you’ve completed the experience build, you’re ready to configure the trigger, and activate the experience. Manual Experiences can be triggered using the CSS Selector or manually from a URL parameter.
<span id="css-selector"></span>
Using the CSS Selector
If you can't quite get the time on your web designer's calendar to add in our smart button code, we recommend using this method to help you trigger an experience on your site without the help of your design team.
Understanding CSS Selector
A CSS selector is code used on the backend of your website to help you style or link elements on your website.
In this article, we'll go over three CSS selectors that are the most common and that can be used to manually trigger experiences for your visitors. Those selectors are:
- CSS class
- CSS id
- Href attribute
CSS Class Selector
A class selector can appear multiple times within your website, such as a styled button that is used for your forms, navigation, or other calls to action. Since this is often not a unique element on the website, we don't recommend using a class as your first choice for your experience trigger.
For example, if the links on your website all have the class of 'styled-link' and you used this as your experience trigger, that means all links on your site would trigger a Qualified.com experience, rather than linking to the page they were pointed to originally.
A class selector is a name preceded by a full stop (“.”) for example: .styled-link
CSS Id Selector
The difference between an id and a class is that an id can be used to identify one element on your website (such as a unique button that appears once), whereas a class can be used to identify more than one which makes it more unique and safer to use as a trigger than a class.
An id selector is a name preceded by a hashtag ("#") for example: #pricingbutton
Note: The id name is case sensitive and the id name must contain at least one character, cannot start with a number, and must not contain whitespaces (spaces, tabs, etc.). Read more on HTML ids.
HREF Attribute Selector
Perhaps the most commonly used and most unique selector is the href attribute selector. You'll see this attribute appear on all links on your website as it what tells your browser where to navigate to when a link is clicked. Due to the fact that you can make any link as unique as you'd like (if you're able to add links to your website), this can be the safest selector to trigger your experience from.
For example, if you're using a website template that you cannot edit the HTML or CSS elements of, but you can create a link or a button, this can then be used as an experience trigger. Your link can be anything you'd like, as it will be used to trigger your experience.
An href selector can be any link in between quotes preceded by href= and wrapped in brackets for example: [HREF="chat-now"].
All of these CSS selectors can trigger a Qualified experience, as long as you also have the Qualified JavaScript on the same page as the element.
Getting Started
To get started with your CSS selector, you’ll want to first determine a few things:
- Which page on your website would you like your experience to appear for your visitors
- Where to place your unique CSS selector on that page (if you don’t already have one)
- Verify that the Qualified JavaScript is installed on the page.
Your unique CSS selector when clicked will trigger the experience you create specifically for that selector and page. You can use any CSS selector syntax that you'd like.
When you add your CSS selector as an experience trigger in Qualified, any links within that CSS element will no longer work. This allows for Qualified to trigger the experience, while your visitor is still on the page rather than the visitor navigating elsewhere after clicking a link.
Add Your Selector
In most cases, you’ll probably already have a CSS selector on your site to designate a style for an element such as a button, tile, or link. If you don’t, you’ll need to add one in order for the smart selector to work its magic.
We recommend if you don't already have one, creating a unique link that we can use to trigger the experience. Keep in mind, we'll use the link to trigger the experience on the page, so the link will not actually take your visitors anywhere.
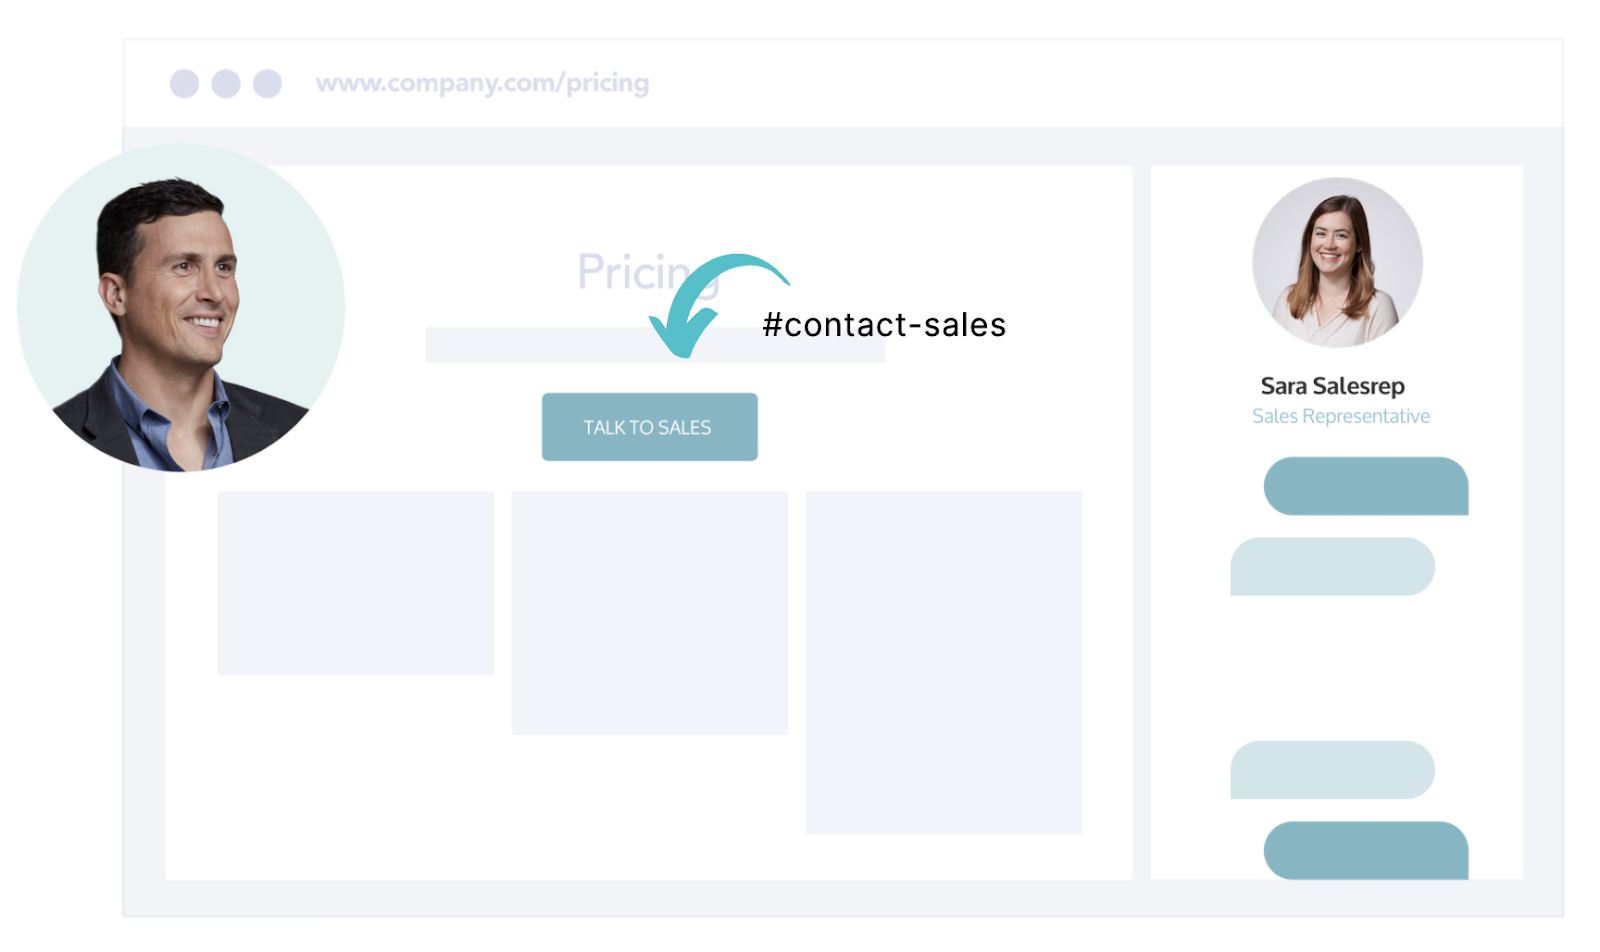
For example, your syntax might look something like below if you have an ID on your button element:
Example: #contact-sales is the ID used to style this button and the ID we will use to tell Qualified to trigger a specific experience.
If we want to ensure the experience is only triggered for this specific button, we can alternatively change the link to this button to be something extremely unique to the experience trigger, as shown below:
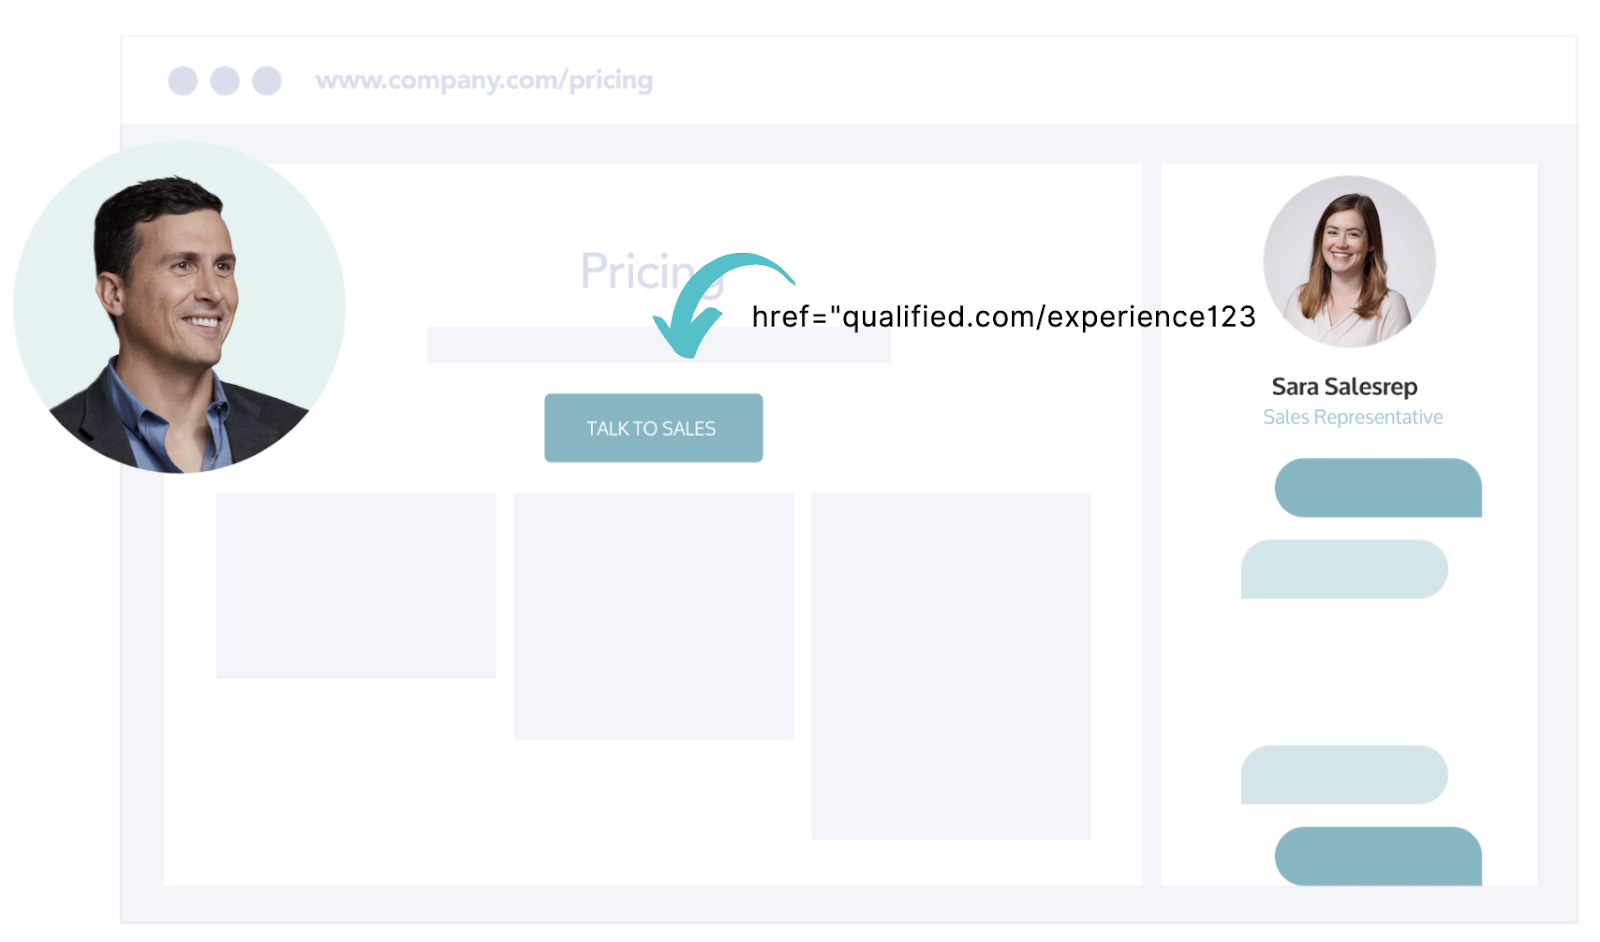
If you have your Qualified JavaScript snippet and experience trigger set up, we'll now look for both. If anyone clicks on any id on the page with #contact-sales or clicks on a link where the href="qualified.com/experience123," we'll trigger your visitor experience.
Set the Experience Trigger
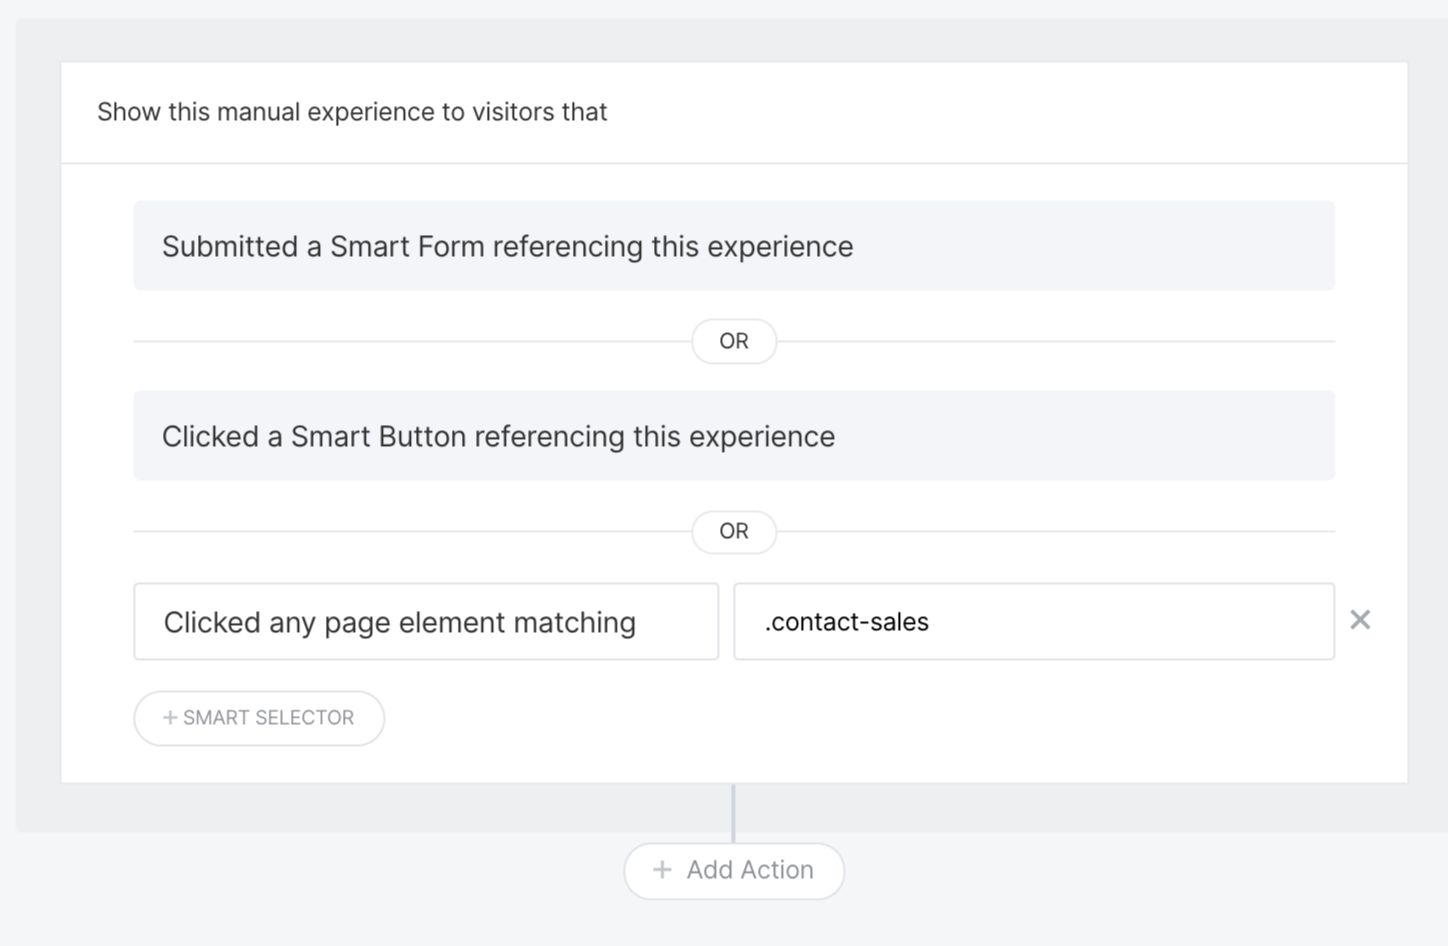
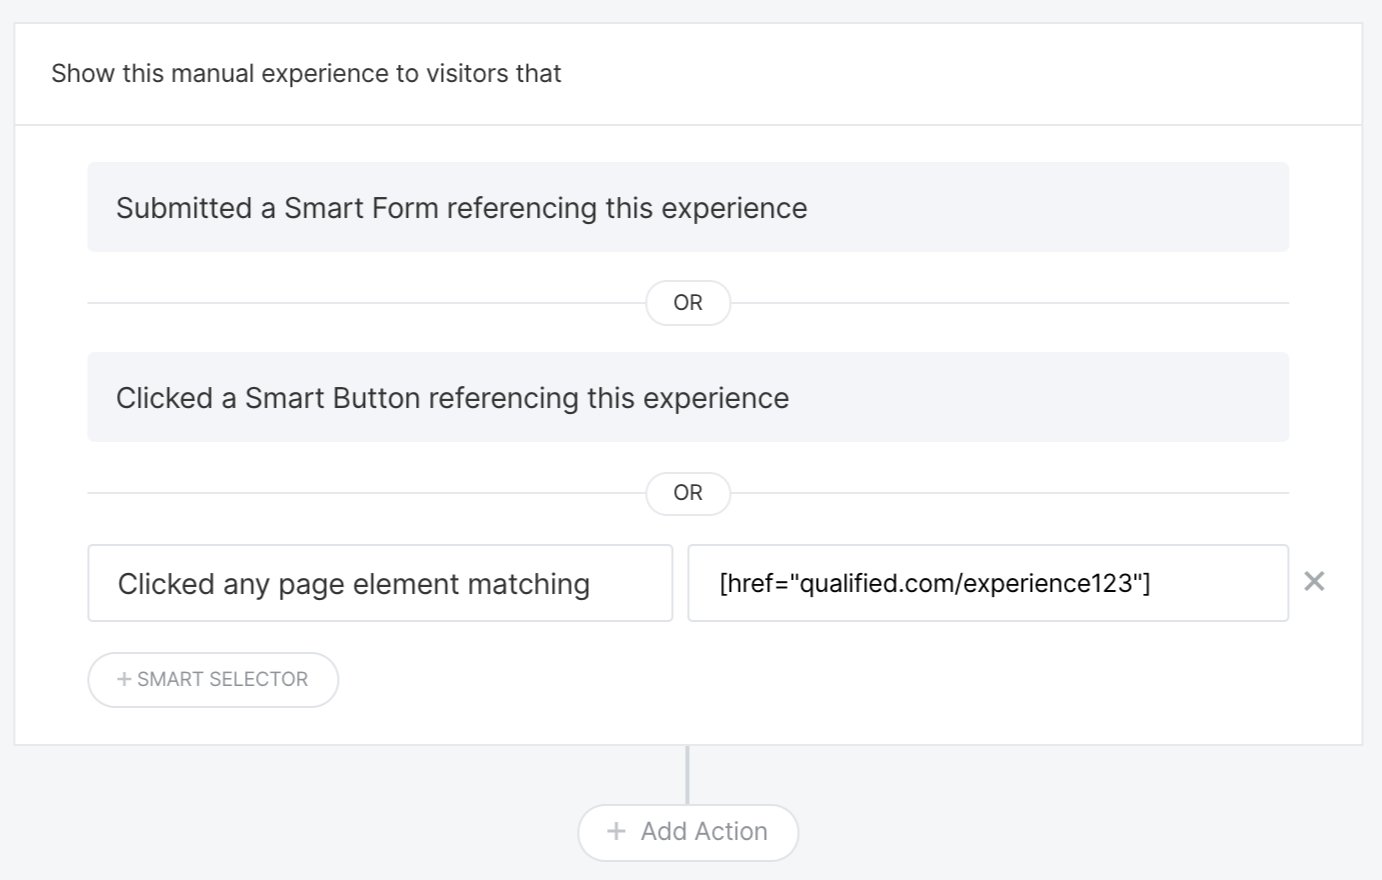
Next, set the trigger in the experience by adding your CSS Selector name as shown below along with the syntax. Once this is added and the experience is turned to active in the Experience Builder sidebar (shown above), Qualified will appear as soon as this element is clicked on your page.
Using the CSS Class selector syntax: .contact-sales
Using the CSS ID selector syntax: #contact-sales

Using the CSS HREF attribute selector syntax: [href="qualified.com/experience123"]
<span id="trigger-via-url"></span>
Triggering a Manual Experience via URL
There are multiple scenarios where you may want to trigger a manual experience via a URL parameter. For example, you want to include a link a page on your website within a marketing email and trigger a customized experience when they arrive, allowing them to chat or book a meeting.
To do this, you’ll need three pieces of information:
- The URL of the page this will be displayed on - whichever makes the most sense, as this is where your visitor will be transferred.
- Our special parameter: ?q_showExperience=
- The Experience ID. In the example below, we will use experience-1616518569689
To locate the Experience ID and build these URLs that will prompt your visitor to take action and give them a personalized experience, simply follow the steps below:
- Head to the Experience builder.
- Select your Manually triggered experience.
- Highlight the Experience ID for your experience, labeled “API NAME” in the upper right-hand corner. It should look something like this: experience-1123556569689.
- Select the boxes on the right to copy that ID.
- Take the URL of the page you would like this meeting booker to display on: example.com
- Append the parameter above (?q_showExperience=) to the end of that URL: example.com?q_showExperience=
- Place the Experience ID at the end: example.com?q_showExperience=experience-1616518569689
Your final URL should look like this:
https://www.example.com/?q_showExperience=experience-1616518569689
You can then use this URL (including everything after the “?”) to trigger a specific experience. You can also configure a QR code to point to this URL, directing visitors to your bespoke experience.
Heading 1
Heading 2
Heading 3
Heading 4
Heading 5
Heading 6
Lorem ipsum dolor sit amet, consectetur adipiscing elit, sed do eiusmod tempor incididunt ut labore et dolore magna aliqua. Ut enim ad minim veniam, quis nostrud exercitation ullamco laboris nisi ut aliquip ex ea commodo consequat. Duis aute irure dolor in reprehenderit in voluptate velit esse cillum dolore eu fugiat nulla pariatur.
Lorem ipsum dolor sit amet, consectetur adipiscing elit, sed do eiusmod tempor incididunt ut labore et dolore magna aliqua. Ut enim ad minim veniam, quis nostrud exercitation ullamco laboris nisi ut aliquip ex ea commodo consequat. Duis aute irure dolor in reprehenderit in voluptate velit esse cillum dolore eu fugiat nulla pariatur.
Lorem ipsum dolor sit amet, consectetur adipiscing elit, sed do eiusmod tempor incididunt ut labore et dolore magna aliqua. Ut enim ad minim veniam, quis nostrud exercitation ullamco laboris nisi ut aliquip ex ea commodo consequat. Duis aute irure dolor in reprehenderit in voluptate velit esse cillum dolore eu fugiat nulla pariatur.

Block quote
Ordered list
- Item 1
- asdfasdf
- asdfasdf
- asdfasdf
- Item 2
- Item 3
Unordered list
- Item A
- Item B
- Item C
Bold text
Emphasis
Superscript
Subscript
|
|---|
|


.svg)


