
Qualified Javascript Setup
Qualified requires a few basic technical setup steps to be enabled on your website, including:
- Qualified Javascript Snippet
- How To Install the JavaScript
- Website Domain Whitelisting
- Live View Block List
- Website Performance
<span id="qualified-javascript"></span>
Qualified Javascript Snippet
The JavaScript snippet is a small piece of code that recognizes visitors, communicates to the Qualified application, and takes appropriate actions. When you initially add the Qualified JavaScript to your site, there's no visible change on your website. After the JavaScript is installed, create and activate your Experiences for the Qualified messenger to appear.
Installing the Javascript
To find the JavaScript snippet for your organization, navigate to Settings → App Settings → Setup.
It's important to note that each JavaScript snippet has a token that is unique to your account. The snippet looks like this:
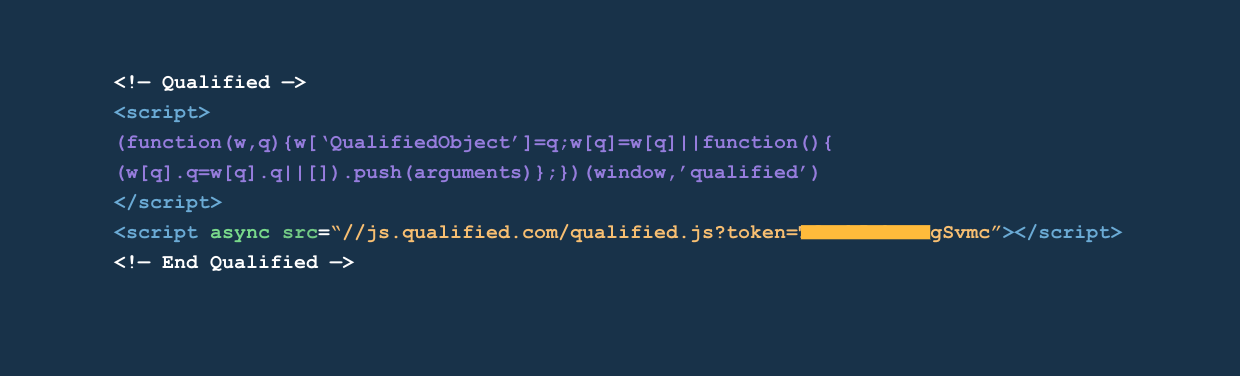
For Single Page Application (SPA) websites - If your website is a Single Page Application, you will need to add this extra line of code whenever a new "page" is loaded (usually referred to as a route transition or navigation).
qualified("page");
Pages to Place the Snippet On
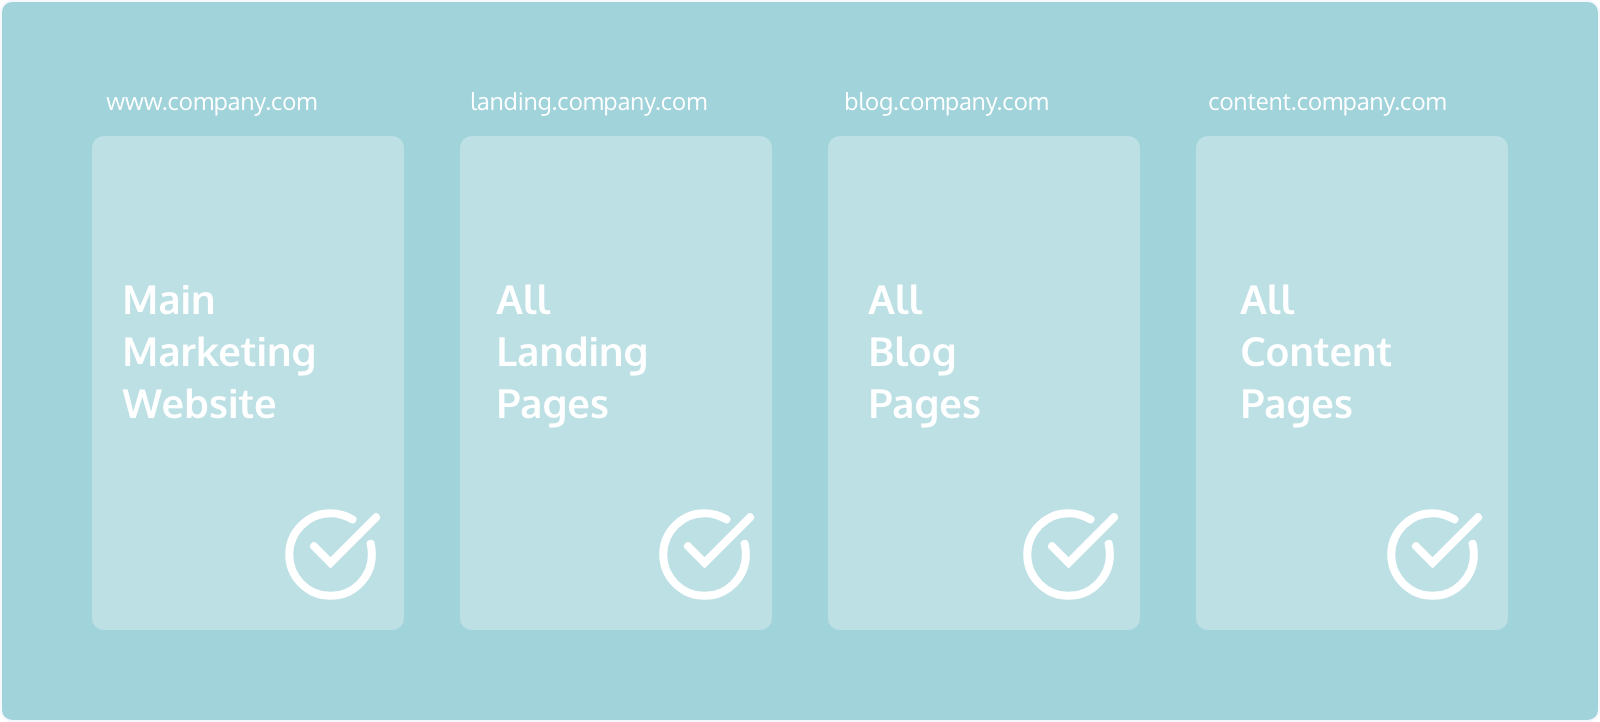
The JavaScript snippet must be placed on every page on your marketing site that you wish to track leads and have conversations. Many companies have a team of web developers who have access to the website infrastructure, and only these folks are allowed to add JavaScript. It's important to note that accurate instructions must be given to install the snippet on all marketing web properties to make sure the system is functioning properly. Consider the following pages on your website which may be running on different platforms or CMS systems:
- Marketing website (usually www.company.com)
- Marketing landing pages (might be running on a landing page service)
- Blogs (which usually run on a separate CMS system)
- Any other web pages served by another app (eg, Marketing Automation)
<span id="install-javascript"></span>
How To Install the JavaScript
For Qualified to function properly, it's important to place the JavaScript snippet on all marketing pages, just before the end of the head section of your website. You can either add this manually to your website, or if you are using a hosting system or other CMS, there is commonly an area where you can paste this into your head section.
Install the Javascript with Google Tag Manager
Qualified supports Google Tag Manager (GTM), but there may be performance or visibility trade-offs.
When possible, we highly recommend adding the Qualified Javascript snippet to the <head> of your website rather than GTM.
If you’d like to add the snippet to GTM, there are two potential risks:
- GTM could cause slow load times. In some cases, Qualified may be loaded at the end of the tag sequence, adding up to 10 seconds of load time to your website. This could affect visitors on your site beginning a session or receiving an experience.
- Some third-party ad-blockers may block Qualified. In this case, the user may not receive a Qualified experience or be recorded in Qualified reporting. If your customer base may be highly likely to use an ad-blocker, we strongly recommend adding the Qualified JavaScript snippet to the <head> of your website rather than GTM.
How to install the Qualified Javascript with GTM:
If you would like to use GTM to install the Qualified Javascript, follow the steps below:
- Navigate to your GTM Workspace.
- Select New Tag and name your tag.
- Select Tag Configuration and find Custom HTML in the right-side menu.
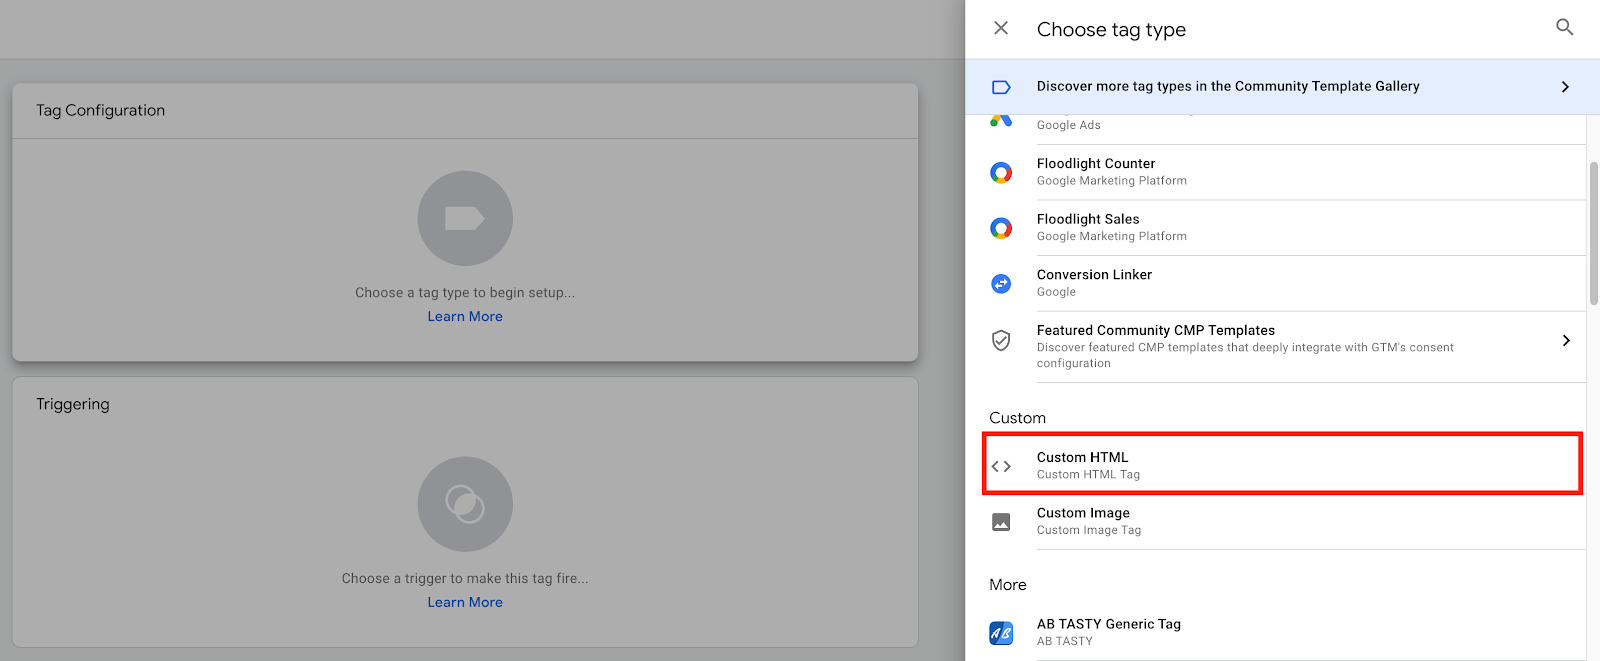
- Insert the Qualified Javascript into the HTML dialog box.
- Click Triggering to select which pages the Qualified Javascript should fire on, then click Save.
- Once saved, click Submit on your GTM dashboard.
If Qualified does not appear after adding the code to GTM:
- You may not have an active experience, leading Qualified to not appear as visible.
- Confirm you have published the tag in GTM.
- Confirm you have applied the correct GTM container to the webpage.
<span id="website-domain-whitelisting"></span>
Website Domain Whitelisting
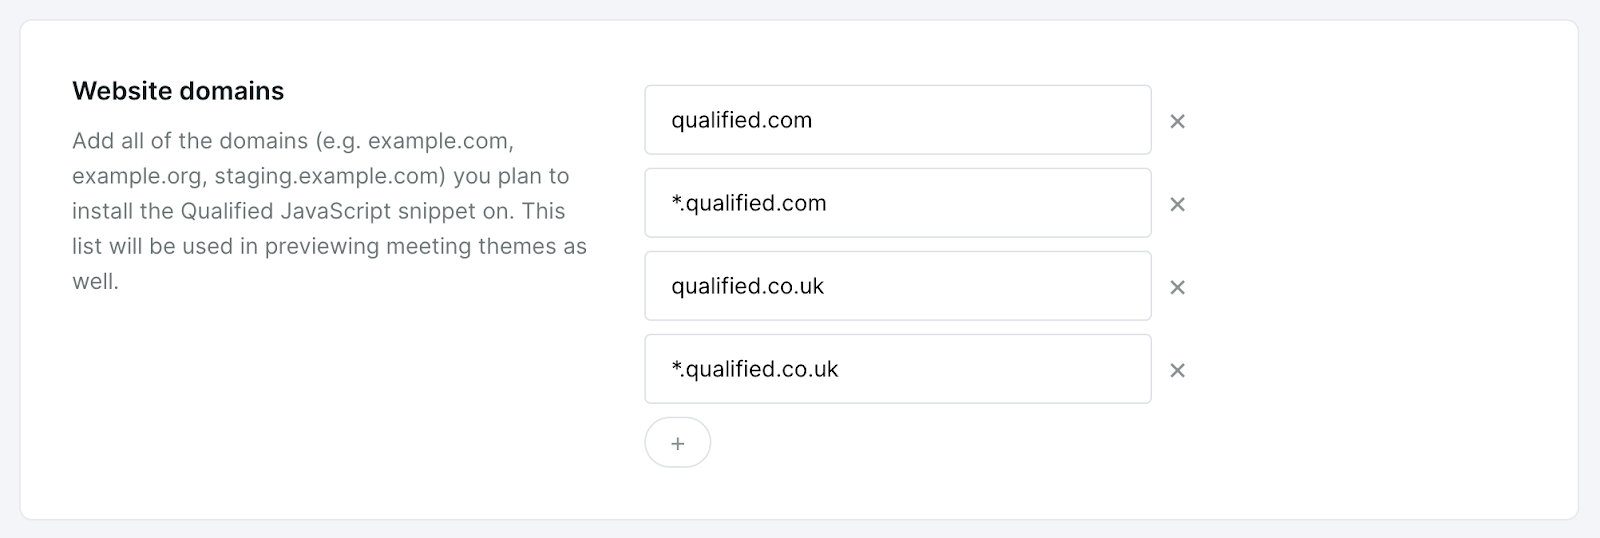
Once the Javascript has been installed, you'll need to add the website domains it has been installed on within Qualified to whitelist them.
- As a Qualified Admin, go to Settings → App Settings → Setup.
- Click the + icon in the “Website domains” section.
- Add your website domain without the "www" prefix.
- Add your website domain with a wildcard (*) as the prefix to cover for "www" and any subdomains.
- If you have multiple domains (ie. qualified.co.uk) be sure to add these as well.
- Once the website domains have been added, click Save in the upper right-hand corner.
<span id="block-list"></span>
Live View Block List
Qualified allows your reps to directly interact with visitors on your marketing website, but you may want to prevent certain parts of your website, like a web application, from appearing in the Live View while you reps engage with visitors on your website.
- As a Qualified Admin, go to Settings → App Settings → Setup.
- Click the + icon in the "Live View Block List" section.
- Add any domains, subdomains, and subpages that you don't want to appear in the live view.
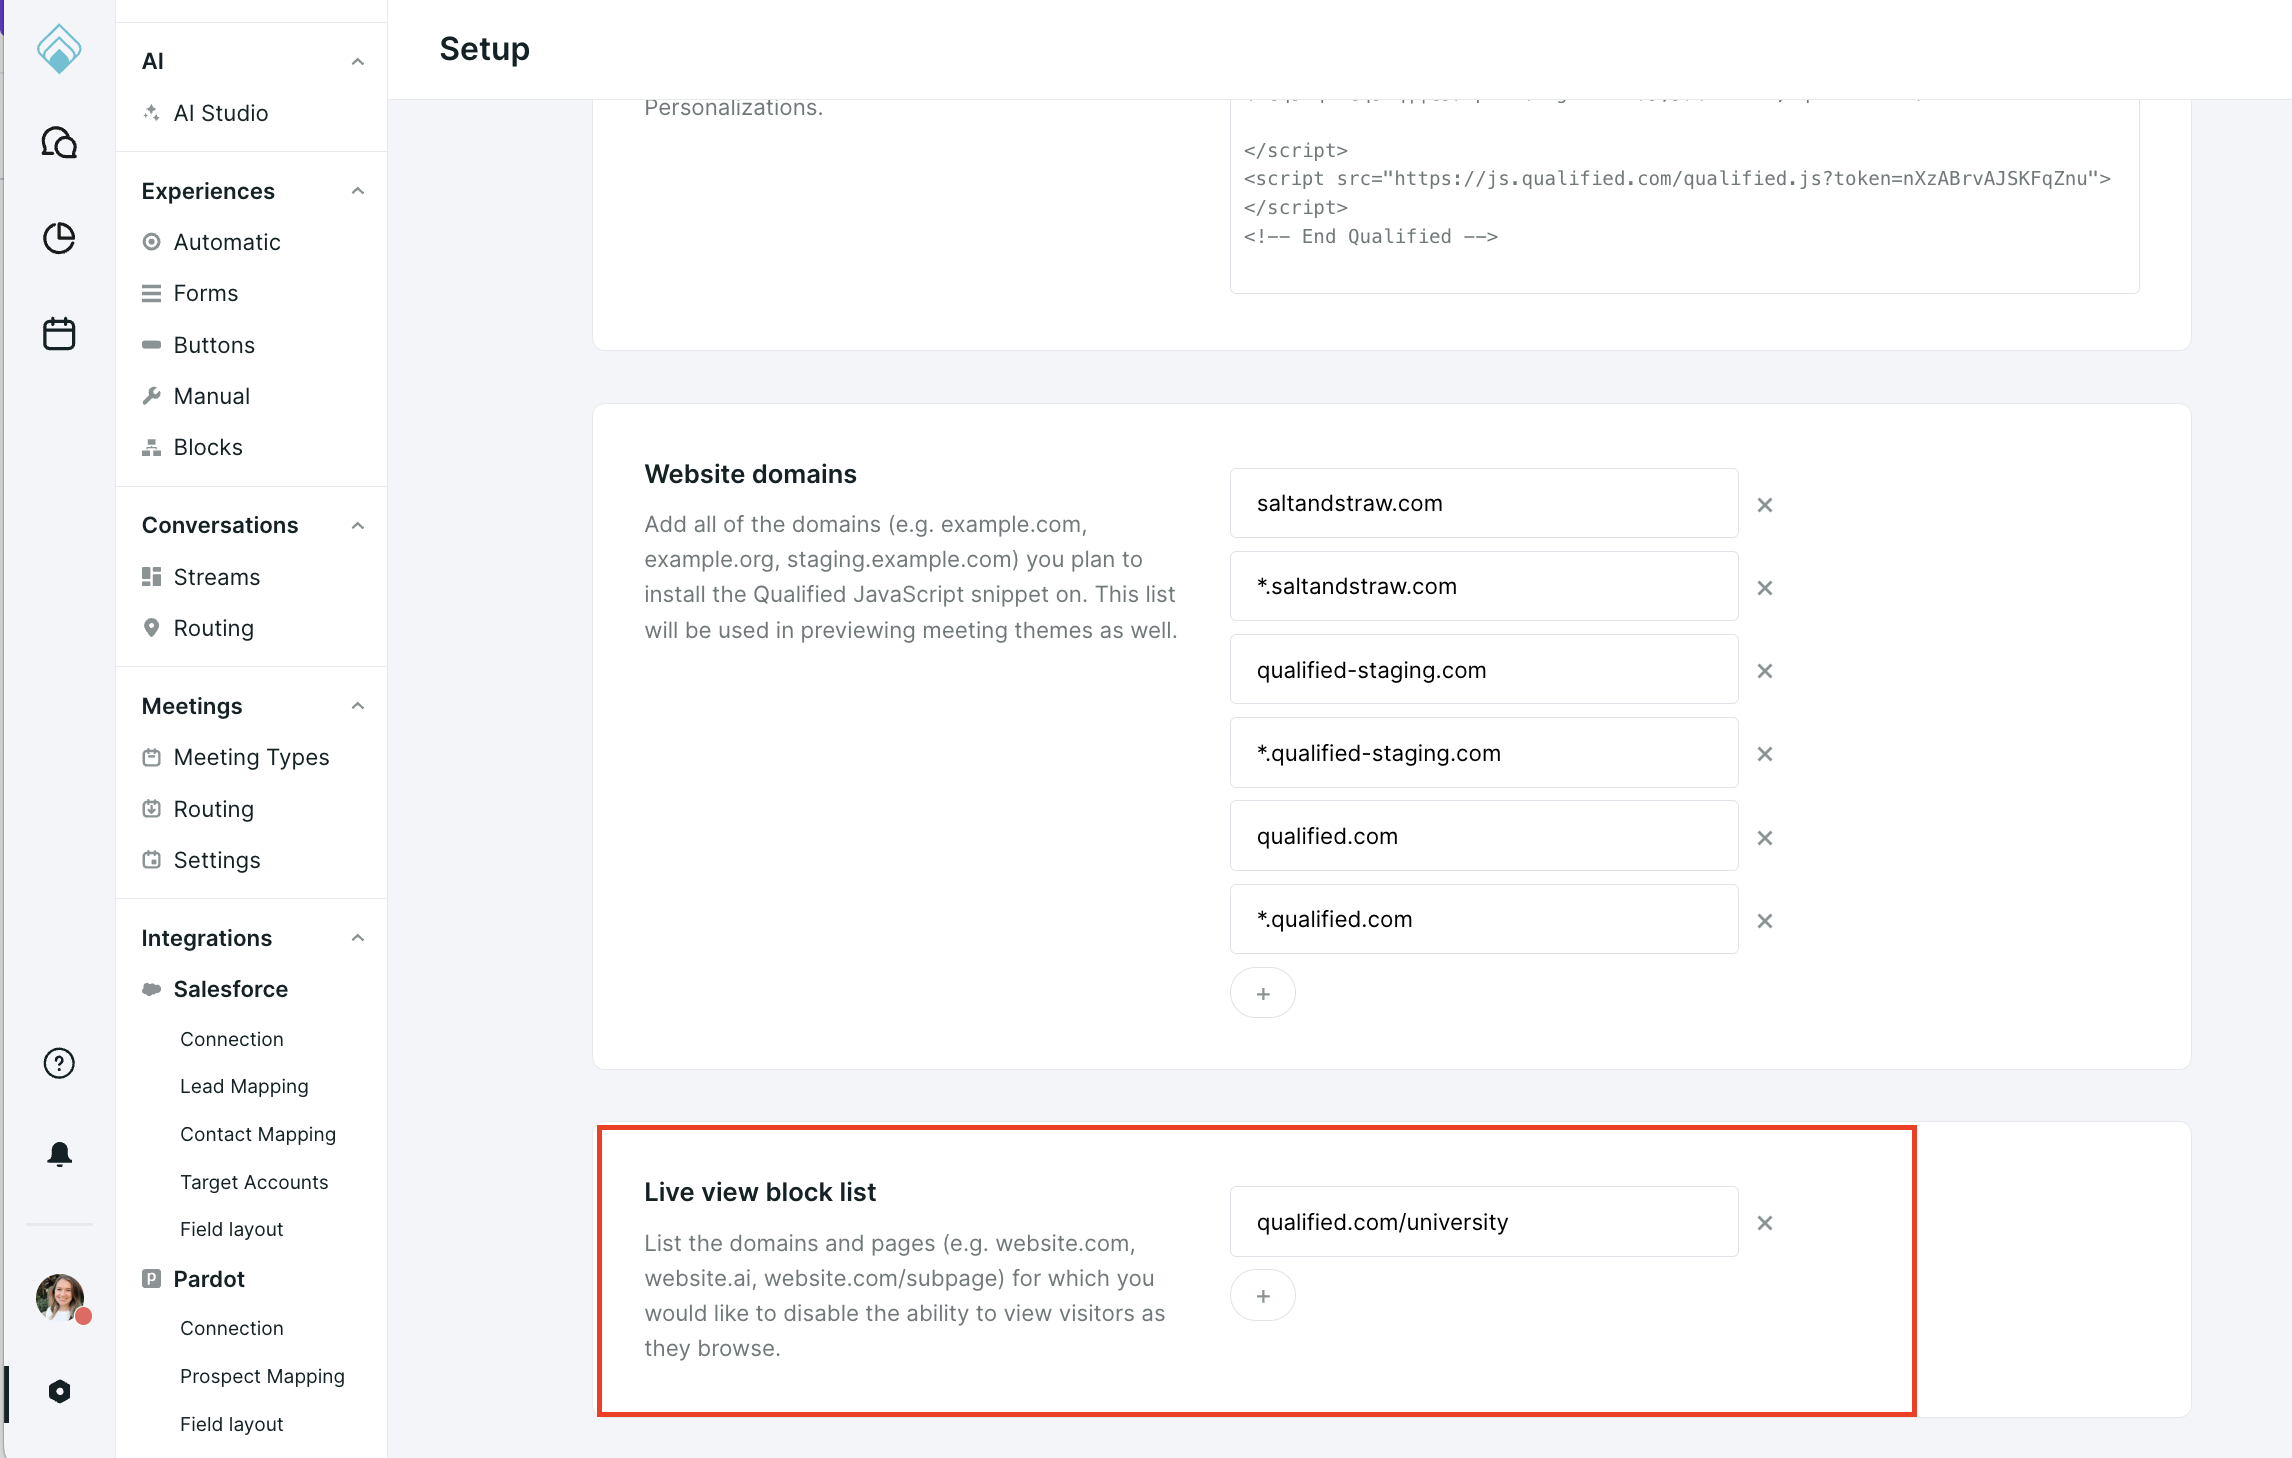
Once enabled, these pages will not appear in the live view of your application.
.png)
If you have a single-party application (SPA), please contact your Qualified Success Architect to support having the live view block list block your application from the live view.
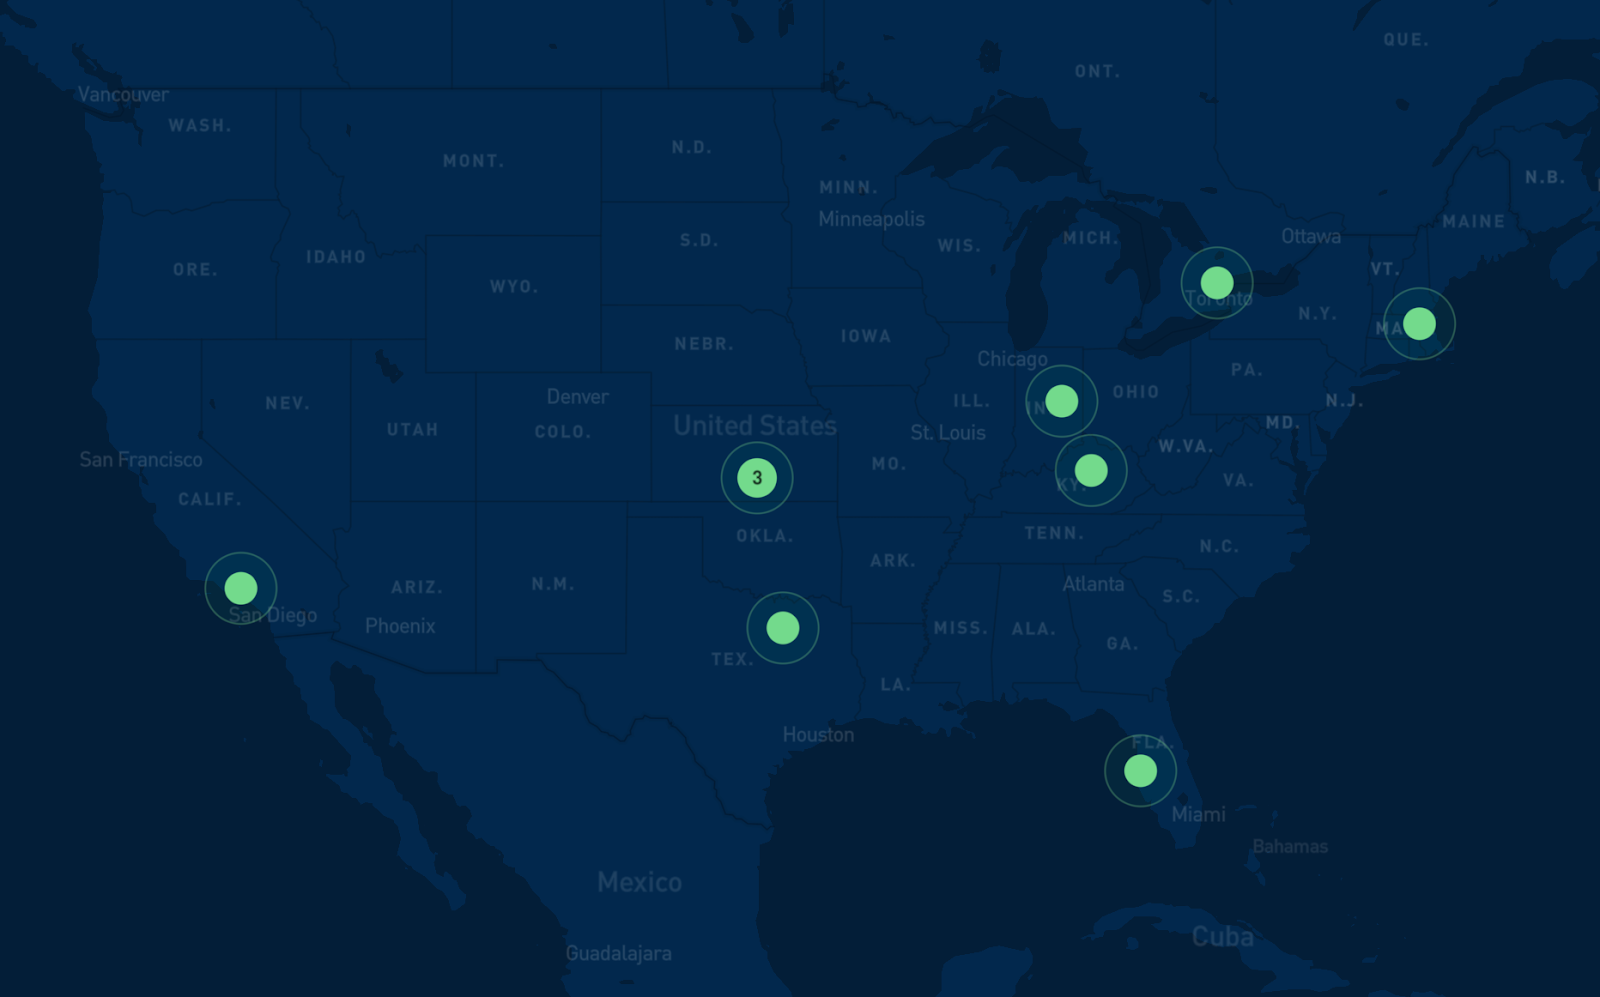
How to Test Successful Installation
You'll know the installation is successful by signing into the Qualified application to see your live website traffic. It's a good idea to do a quick test by opening an incognito window and testing all of the sections on your website, including your main marketing site, landing pages, blog pages, and pages served by other apps, such as content pages. You'll see the visitors on your site on the main map, as seen below.
<span id="website-performance"></span>
Website Performance
The Qualified JavaScript fires asynchronously on your website after first content paint, so there will be no (or technically a negligible) performance impact to site load time.
The remainder of the loading sequence also happens asynchronously to serve a personalized Experience.
Heading 1
Heading 2
Heading 3
Heading 4
Heading 5
Heading 6
Lorem ipsum dolor sit amet, consectetur adipiscing elit, sed do eiusmod tempor incididunt ut labore et dolore magna aliqua. Ut enim ad minim veniam, quis nostrud exercitation ullamco laboris nisi ut aliquip ex ea commodo consequat. Duis aute irure dolor in reprehenderit in voluptate velit esse cillum dolore eu fugiat nulla pariatur.
Lorem ipsum dolor sit amet, consectetur adipiscing elit, sed do eiusmod tempor incididunt ut labore et dolore magna aliqua. Ut enim ad minim veniam, quis nostrud exercitation ullamco laboris nisi ut aliquip ex ea commodo consequat. Duis aute irure dolor in reprehenderit in voluptate velit esse cillum dolore eu fugiat nulla pariatur.
Lorem ipsum dolor sit amet, consectetur adipiscing elit, sed do eiusmod tempor incididunt ut labore et dolore magna aliqua. Ut enim ad minim veniam, quis nostrud exercitation ullamco laboris nisi ut aliquip ex ea commodo consequat. Duis aute irure dolor in reprehenderit in voluptate velit esse cillum dolore eu fugiat nulla pariatur.

Block quote
Ordered list
- Item 1
- asdfasdf
- asdfasdf
- asdfasdf
- Item 2
- Item 3
Unordered list
- Item A
- Item B
- Item C
Bold text
Emphasis
Superscript
Subscript
|
|---|
|


.svg)


